|
Step 2 - Install the Activation Server |

|

|

|

|
|
Step 2 - Install the Activation Server |
|
|
|
|
There are 2 installation packages:
| • | MSI package. It is recommended to use this package because it checks if all necessary system requirements like IIS, ASP.NET are available, creates the database and configures the Activation Server |
| • | The ZIP file contains only the files of the Activation Server with the necessary folder structure. The setup has to be done manually. This could be necessary if you have no admin access to the server and a provider wants to have control the installation of tools like IIS or ASP.NET. See Installation using ZIP file |
If you install an existing version, see Install Updates
To start the installation, execute install-activation-server.msi
 |
| Activation Server - Welcome Screen |
1. Check System Requirements
The installer will first check if you have all necessary components installed. If a component is missing, install the component and start the MSI installer again. You find a download link for all necessary components in the chapter - System Requirements.
 |
| Activation Server - Check Requirements |
![]() indicates that the component is installed
indicates that the component is installed
![]() indicates, that the component is not installed
indicates, that the component is not installed
![]() indicates, that the component is not installed or the version of the installed component is unclear
indicates, that the component is not installed or the version of the installed component is unclear
You can continue if you get ![]() or
or ![]()
 |
| Activation Server - Accept license agreement |
2. Create Web Site
You have to create a Web Site for the Activation Server server. Normally you would create a new website below the default web \inetpub\wwroot\lpweb.
 |
| Activation Server - Select Website |
Select Choose Website . You have to select an installation folder. Only change the default values if your server needs a different configuration.
 |
| Activation Server - Website Settings |
If you want to replace/update an existing Activation Server, the Virtual directory name must match the name you use in your application. A backup from the selected folder is generated and the SQL login data is automatically retrieved (see next page - Configure SQL Server).
3. Configure SQL Server
Type in the SQL Servername\instance. If you use SQL Server Express Edition, the default server name is .\SQLEXPRESS. To create the database for the Activation Server server, the installer need the login data and administrator rights for the database. Either specify Integrated Windows authentication or specify an existing SQL server user with admin rights. These credentials are used only to create the database and add users.
 |
| Activation Server - SQL Server login |
If you get an error message:
| • | The provided user account is invalid it has insufficient user rights to create an User and or Login! or |
| • | This database server only supports integrated windows authentication - Please enable SQL Logins to continue Setup! |
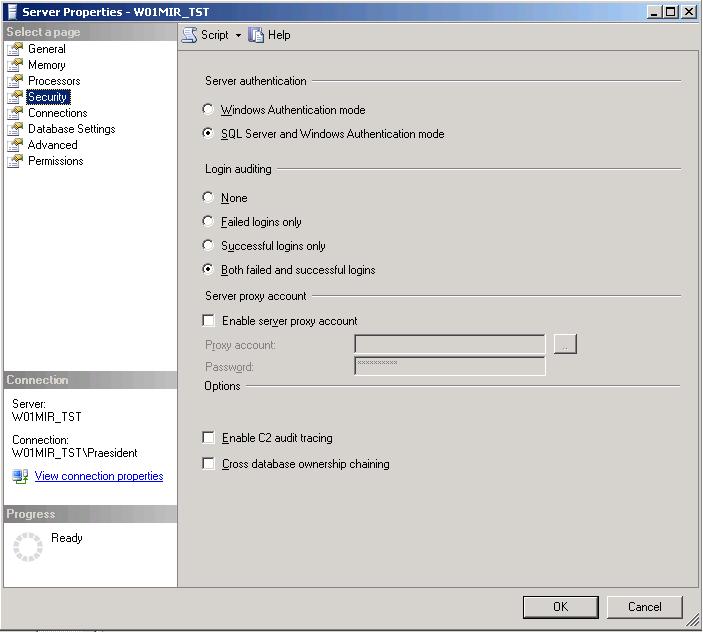
then change the mode to SQL Server and Windows Authentication mode and/or update the user right. Otherwise you cannot continue.
During installation, SQL Server Database Engine is set to either Windows Authentication mode or SQL Server and Windows Authentication mode.
To change security authentication mode
|
Create new database - new installation
You can now specify the database name and the user name. A default user with a random password is displayed. You can change username and/or password. Check: Create a new database.
 |
| Activation Server - Create new database |
Update existing database
By default, the settings are retrieved from your existing configuration (web.config). Specify the existing database name, an existing user name and the password of this user. The option to create a new database is not available.
 |
| Activation Server - Update existing database |
The install creates the database, adds tables and default values. The database and user name is stored in the file web.config
4. Ready to Install
You provided now all necessary information to start the installation. You could review your settings using the Back button.
 |
| Activation Server - Ready to Install |
The installation files are copied to selected folder. The database is created and the IIS is configured.
5. Final Summary page
The final page gives you a summary of all the selections you made during the installation. Write down the username and password of the SQL server.
6. Start Web Administration Interface
The next step is to start the Web Administration Interface. It is automatically started. Goto Step 3 - Test Administration Interface.
 |
| Activation Server - Open Administration Interface |