Activation Server 5
A Microsoft SQL Server or SQL Server Express (2005 or higher up to SQL Server 2012) is required.
The installer will automatically download SQL Server 2012 Express Edition. If you already have an SQL Server installed then you can skip this step.
The collation must be: Latin1 General CP1 CI AS

The Activation Server 5 does not include a license for the MS-SQL server and you are responsible to use the MS-SQL server with the correct licensing.
Step by Step installation and configuration guide - SQL Server 2012
Find below screenshots of the installation process.
Start the installation by clicking on Installation on the left side

Start Installation

Confirm License Terms

Select all product updates
Select Database Engine Services

Select the feature to install
Name of the SQL Instance / Server - If you change the name you have to note it down as it is required later. The default name is: SQLExpress

Instance Name
The SQL server installation could take a while and it could require a restart of the server. Once the server is installed additional configuration is necessary.
Select: NT Service

Select Account: NT Service
Click on the TAB Collation - Ensure that Latin1 General CP1 CI AS is selected

Select Collation
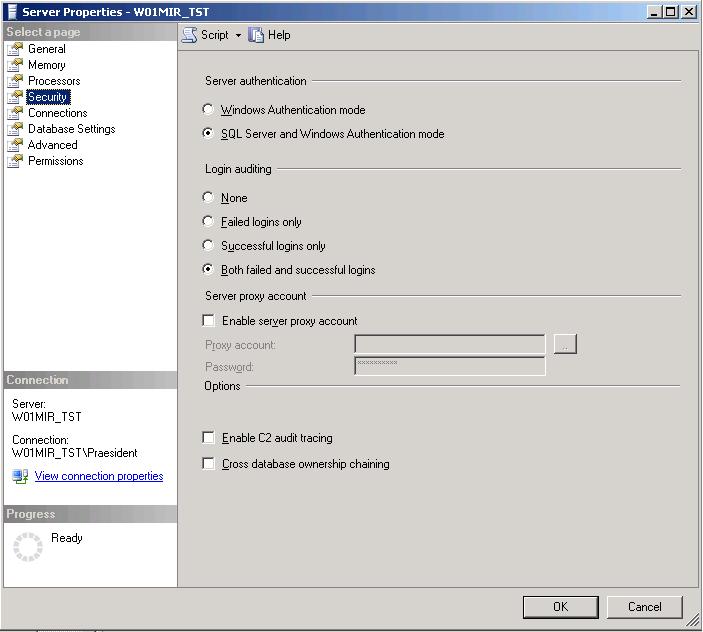
The next step is crucial.
The SQL server must be configured for SQL Server and Windows Authentication mode.
Type in a password and note it down. This is the password for the user sa

Configure authentication mode
Specify the SQL server administrator and select: Administrator (Click on Add to select from a list)

Specify SQL Server administrator
The final screen should display that all components have been successfully installed.

Screen Complete - must display all components with a green icon
Step by Step installation and configuration guide - SQL Server 2008
Find below screenshots of the installation process.


Change security authentication after installation
In case the wrong security information was selected during the initial installation of the SQL Server, it can be changed later.