
Unaric Voice
Erstellung des Runbooks
Das Runbook führt ein PowerShell-Skript aus, das eine Verbindung zu Teams herstellt, die Warteschlangendetails erfasst und sie in einer JSON-Datei im Container speichert.
Um es zu erstellen, folgen Sie den nachstehenden Schritten.
1. Gehen Sie zu dem Automation Account, den Sie zuvor erstellt haben.
Klicken Sie im linken Menü unter Process Automation auf Runbooks.
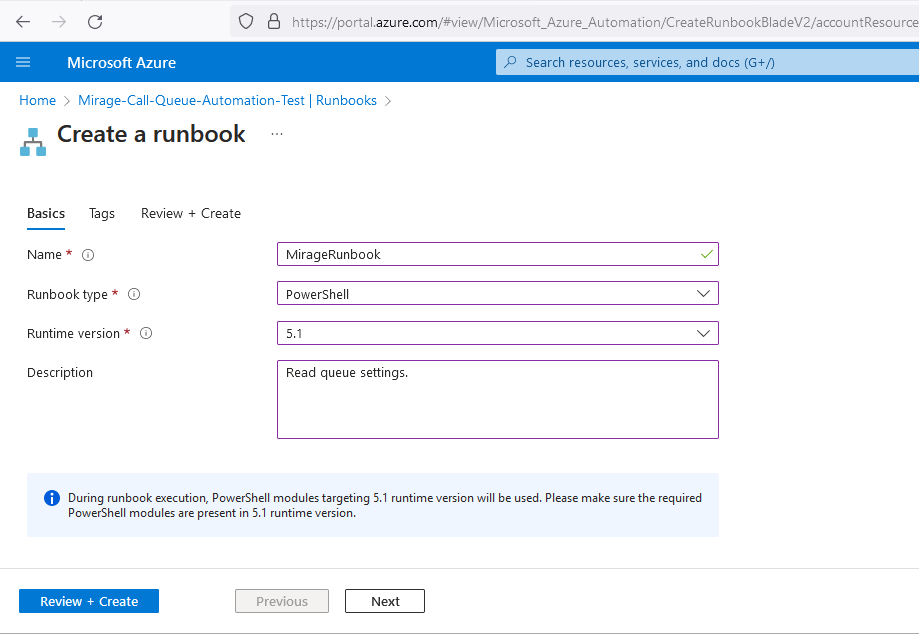
2. Klicken Sie im oberen Menü auf + Create a runbook
Geben Sie dem Runbook einen Namen (basierend auf Ihrer Namenskonvention), wählen Sie PowerShell als Typ und die Runtime-Version 5.1, wie im folgenden Beispiel gezeigt.
Klicken Sie auf Review + Create und dann auf Create.
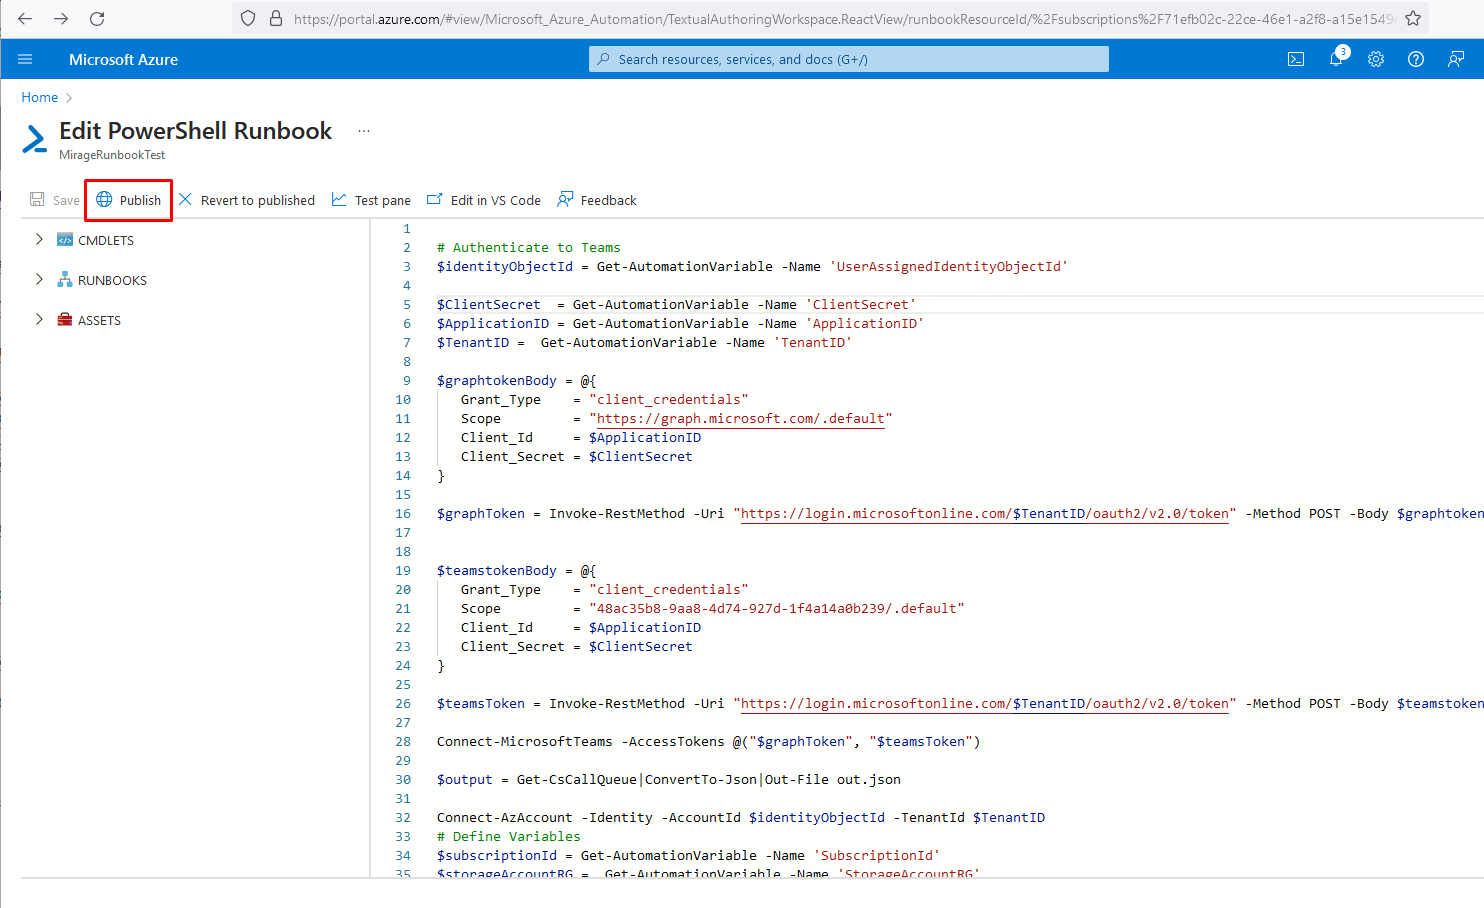
3. Kopieren Sie den folgenden Code und fügen Sie diesen in das Runbook ein:
# Authenticate to Teams
$identityObjectId = Get-AutomationVariable -Name 'UserAssignedIdentityObjectId'
$ClientSecret = Get-AutomationVariable -Name 'ClientSecret'
$ApplicationID = Get-AutomationVariable -Name 'ApplicationID'
$TenantID = Get-AutomationVariable -Name 'TenantID'
$graphtokenBody = @{
Grant_Type = "client_credentials"
Scope = "https://graph.microsoft.com/.default"
Client_Id = $ApplicationID
Client_Secret = $ClientSecret
}
$graphToken = Invoke-RestMethod -Uri "https://login.microsoftonline.com/$TenantID/oauth2/v2.0/token" -Method POST -Body $graphtokenBody | Select-Object -ExpandProperty Access_Token
$teamstokenBody = @{
Grant_Type = "client_credentials"
Scope = "48ac35b8-9aa8-4d74-927d-1f4a14a0b239/.default"
Client_Id = $ApplicationID
Client_Secret = $ClientSecret
}
$teamsToken = Invoke-RestMethod -Uri "https://login.microsoftonline.com/$TenantID/oauth2/v2.0/token" -Method POST -Body $teamstokenBody | Select-Object -ExpandProperty Access_Token
Connect-MicrosoftTeams -AccessTokens @("$graphToken", "$teamsToken")
$output = Get-CsCallQueue|ConvertTo-Json|Out-File out.json
Connect-AzAccount -Identity -AccountId $identityObjectId -TenantId $TenantID
# Define Variables
$subscriptionId = Get-AutomationVariable -Name 'SubscriptionId'
$storageAccountRG = Get-AutomationVariable -Name 'StorageAccountRG'
$storageAccountName = Get-AutomationVariable -Name 'StorageAccountName'
$storageContainerName = Get-AutomationVariable -Name 'StorageContainerName'
# Select right Azure Subscription
Select-AzSubscription -SubscriptionId $subscriptionId
# Get Storage Account Key
$storageAccountKey = (Get-AzStorageAccountKey -ResourceGroupName $storageAccountRG -AccountName $storageAccountName).Value[0]
# Set AzStorageContext
$ctx = New-AzStorageContext -StorageAccountName $storageAccountName -StorageAccountKey $storageAccountKey
Set-AzStorageBlobContent -Force -Container $storageContainerName -File out.json -Blob call-queues-result.json -Context $ctx
4. Klicken Sie auf Publish, um die Erstellung des Runbooks abzuschließen.
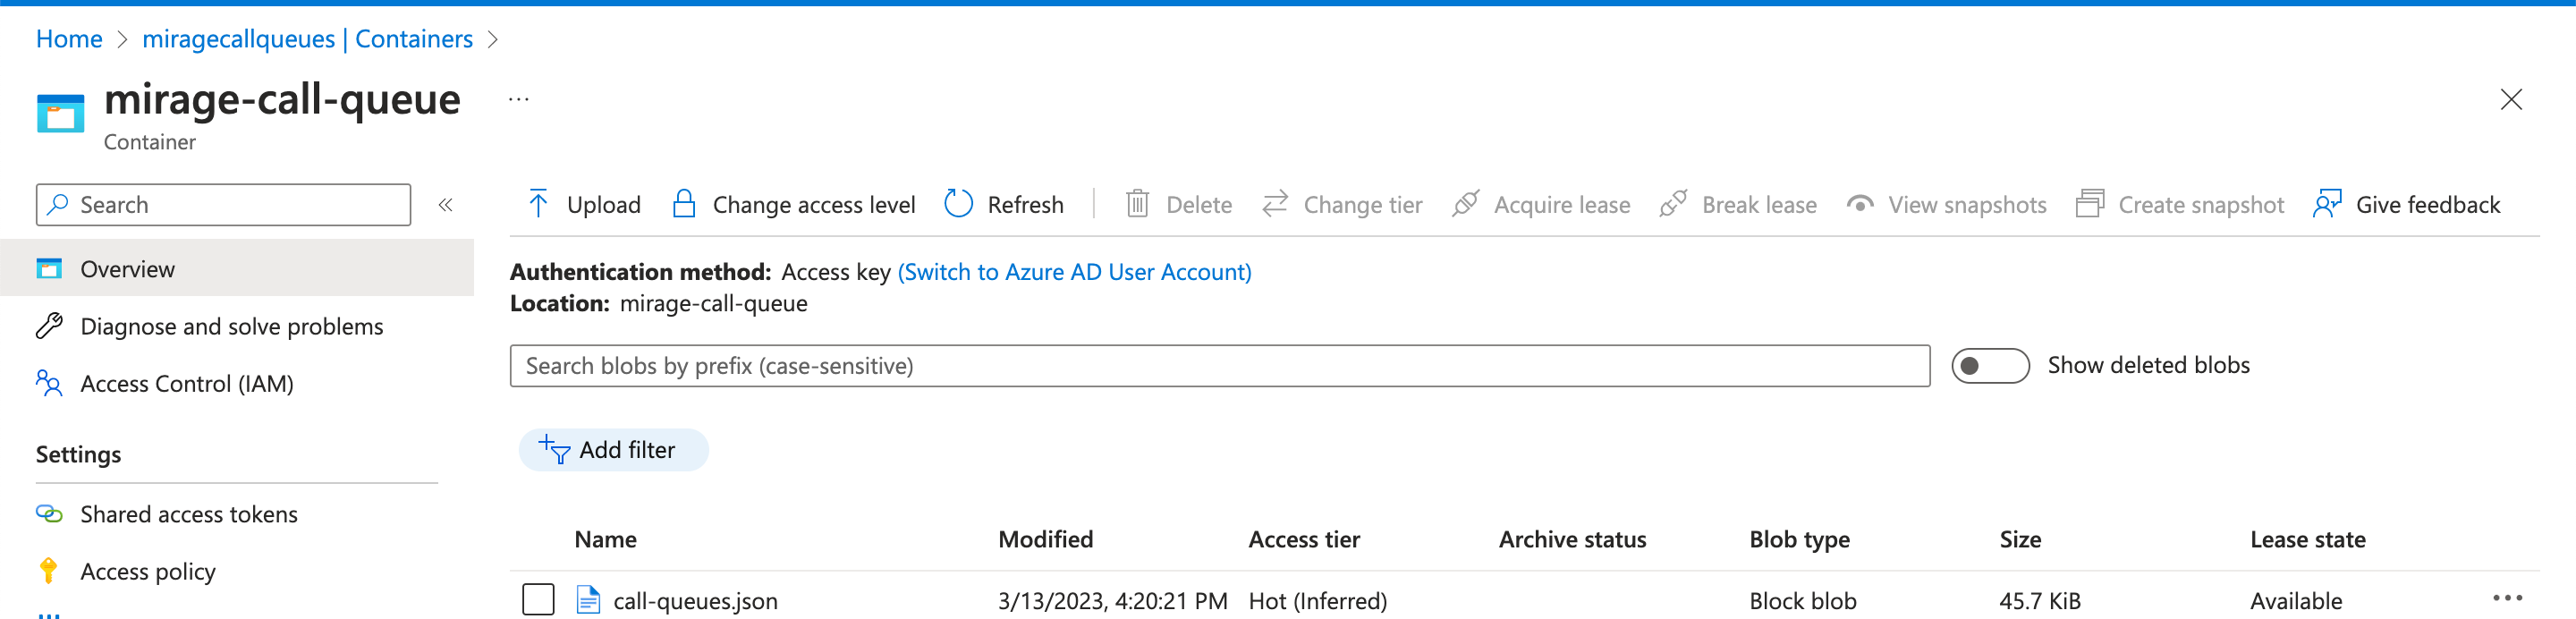
5. Führen Sie nun das Runbook einmal aus, indem Sie den Startknopf drücken, um das Ergebnis zu sehen.

Die JSON-Datei sollte nun innerhalb des Containers des Speicherkontos, der in den vorangegangenen Schritten erstellt wurde, generiert werden.
Bitte fahren Sie mit der Erstellung des Webhooks fort.
