
All-In-One Protector 8
To manually create an Unlock Key switch to the TAB Keys, Unlock Key with Copy Protection
You have to open the project before you can create an Unlock Key. This is necessary as every project has a different encryption to ensure, that an Unlock Key from product A cannot be used on product B.
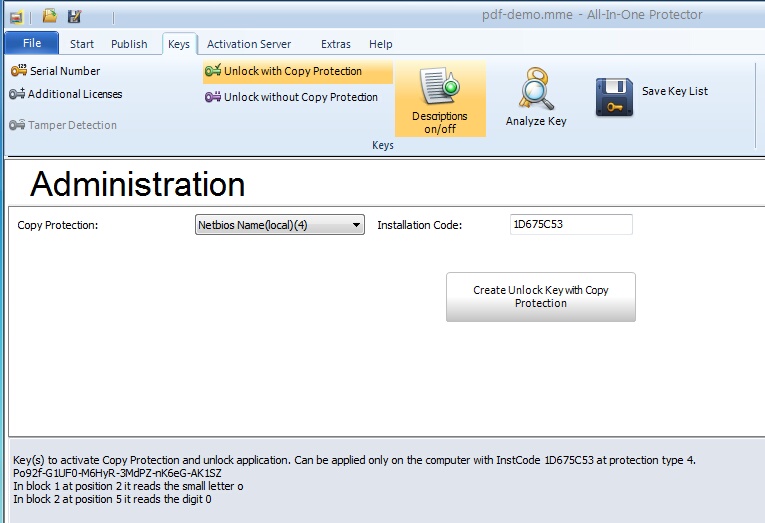
Copy Protection
In the picklist select type of copy protection (Volume ID, MAC Address, Hostname etc.) you want to use.
For single user installations or CD distribution, the hardware ID 13 (Windows ID) is recommended. For network installations use installation code 5 (Volume ID + UNC Path) or 6 (MAC Address + UNC Path). If the user installs the product on an own usb flash drive the code 11 is required.
Installation Code
Enter the Hardware ID (8 digit ID) which is transmitted from the customer. It is case sensitive.

If a hardware ID can not be retrieved (e.g. there is no network adapter) then the code is empty. You have to use a different installation code then.
Create and Save Key
After pressing the button Create Unlock Key with Copy Protection, the key including the extended description is copied into the text box. It is also copied into the clipboard.
The content of the text box can be saved to a file by clicking on the icon  .
.
Descriptions On / Off
You can add an additional description when a key is generated. This is useful when the user gets the key on paper.
GPcoX-35dA8-C8Gch-2Xd7C-5Pn1Q-AfiCL
In block 1 at position 4 it reads the small letter o
The button is a toggle which is turned on or off
 description is on
 description is off
Send Unlock Key to customer
Send the Unlock Key to the customer who will use the key in the screen Enter Unlock Key.
See also
The design of a key is described in Format of a Key
To better understand the Hardware ID see chapter Hardware ID.
